
It’s hard to be objective about the merits of culturally significant moments of one’s youth. Nostalgia can cloud your judgment, making it hard to tell a madeleine from a Twinkie. Take the films of the 80s, for example. Is Pretty in Pink a great movie or a terrible one? Was The Empire Strikes Back a work of genius or unbelievably boring? Sometimes, it’s an easy call. Coming to America was a great movie. Fast Times at Ridgemont High was a great movie. Cocktail was a terrible movie.
But let’s say you’re of a certain adventurous turn of mind when, at twenty years old and with nothing better to do on a summer night, you go the movies with some friends while home from college. I speak not of myself, of course, but of a casual acquaintance who may or may not have coached my brother in boy’s tennis in the late 80s. We shall call him T.W., as those are his initials. According to my brother, T.W. saw Cocktail while home for the summer, and, moved to greater aspirations than whatever was in his mind at the moment, packed his bags and set out for the glamour of south Florida. As far as I know, it didn’t last all that long – I think he was missing a few crucial plot elements, like an older, Svengali-esque friend to show him the ropes – and at some point, T.W. returned to UW-Whitewater to obtain his bachelor’s degree and never speak again of his adventures as a lesser Tom Cruise. I don’t even know if he ever learned to flair, which was the only genuinely enjoyable thing about the movie.
I don’t know if Cocktail The Movie renewed interest at the time in cocktail culture. My range of cocktails was limited then to Bacardi and Coke or grapefruit juice and vodka, mostly guzzled rather than sipped. Now, I’m much more interested in the kind of cocktails that require more bartending skill and taste than opening a can of something and pouring in a few glugs of something else. As a bonus, many bars that mix great drinks also serve food more interesting than mediocre wings and pretzels.
As opposed to beer and wine pairings with food, cocktail and food pairings aren’t really my thing. My idea of pairing cocktails with food mostly extends to eating a little bowl of peanuts – or possibly even smoked almonds or those nice warm mixed nuts you get in first class on international fights – with my whiskey. Supposedly classic cocktail pairings with food, like margaritas with Mexican food or mimosas with brunch, never strike me as really great food pairings so much as opportunities to consume more alcohol. On the rare occasion I eat or serve something other than nuts with strong drinks, I like it to be rich and fatty. Foie gras is perfect – it’s buttery and tastes good with sweeter wines like Sauternes and liquor like Cognac, which are often used in its preparation.
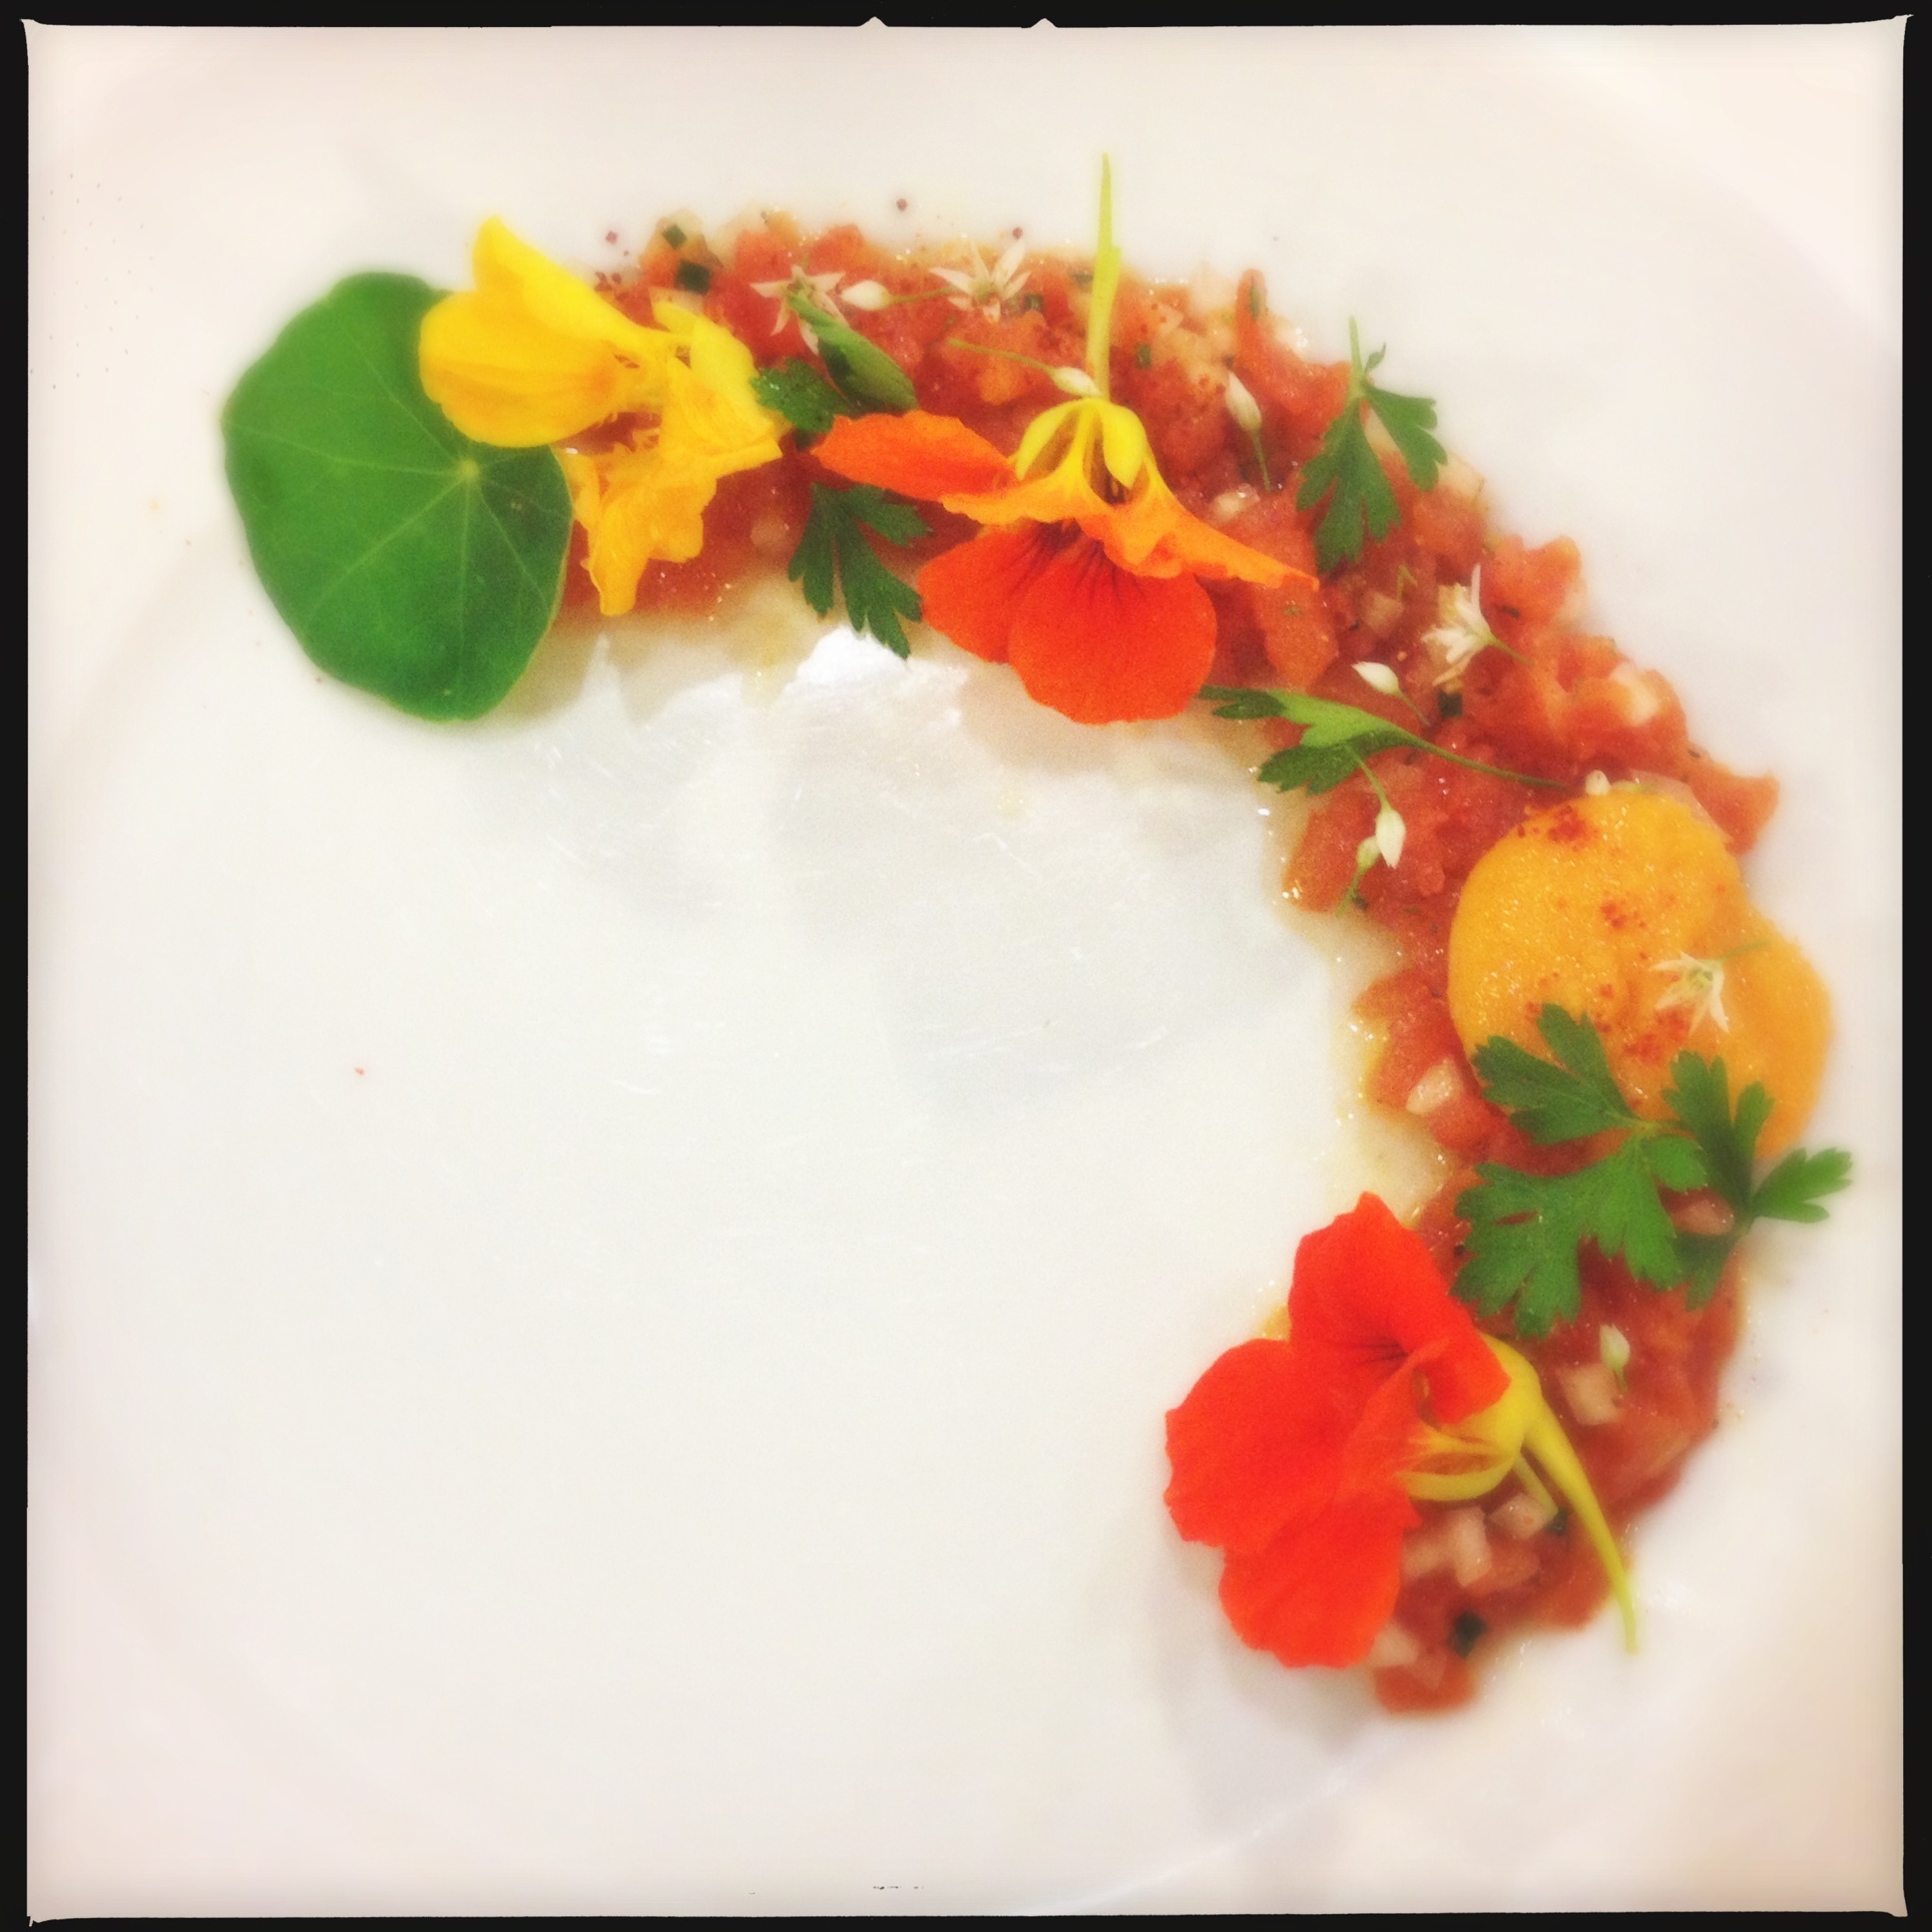
Foie gras torchon
This foie preparation is not cooked at any point. Burying the wrapped torchon in salt and then hanging dry draw out the moisture from the liquor marinade, giving the foie a dense, buttery texture, with no melted fat whatsoever. It is important to keep the foie cold and your work surface scrupulously clean when working with the product as it will not be cooked. (Even cooked torchon tends to simmered only for a short time at temperatures far under those necessary to destroy pathogens.)
In this recipe, I used foie slices from our supermarket because I didn’t have time to order whole lobes. The whole lobes are nicer but are slightly more of a pain to work with because you have to remove the blood vessels and connective tissue. That said, no one makes a torchon unless they’re fine with doing that work anyway.
The foie pairs well with a tart, somewhat pungent condiment like nectarine mostarda, which includes both vinegar and mustard seeds.
7.5g kosher salt
1.5g smoked sugar
.25g TCM (about 1/8 tsp, not quite)
1g white pepper
1g Pondicherry pepper
500g foie gras, whole lobe or slices
200 ml water
25 ml each bourbon and Pedro Ximenez jerez
coarse (not rock) salt
2 lbs nectarines
1 c white wine vinegar
2/3 c sugar
2 tbsp yellow mustard seeds
1 tsp piment d’espelette
zest of one lemon (peeled off in strips, not grated)
Combine all dry seasonings and set aside.
With clean hands and maintaining a very clean working environment, clean the foie, removing the veins, gallbladder (if present), and connective tissue from the foie. If you use pre-cut slices these likely will have been removed already, but double check. Place in a bowl and cover with cold water. Refrigerate about 2-4 hours. Drain thoroughly and rinse. Return to a clean bowl.
Evenly season the foie and cover with the alcohols. Place a piece of clingfilm over the foie to reduce oxidation and then tightly seal the bowl. Chill 24-36 hours.
Prepare a triple thickness of butter muslin or cheesecloth. Spread in a rectangle over a piece of clingfilm and cover with another piece. Roll with a pin into a uniform layer about 3/8″ thick. Remove the top piece of film. (Note: I used the pin method because, as this is a raw preparation, I wanted to touch it with my hands as little as possible. You can also use your hands to mold it together.) Using the bottom layer of clingfilm as a guide, roll the foie tightly into a log as you would a piece of makizushi. If using a bamboo mat helps, transfer the foie and clingfilm to a bamboo mat before rolling tightly.


Roll the foie torchon from the clingfilm onto the prepared butter muslin. Roll tightly to close and, using butcher’s twine, wind tightly and tie at each end. Bury in sea salt (not rock salt) in a pan and refrigerate 12-24 hours.

Remove all salt and dust the muslin log clean. Hang to dry from a rack in the refrigerator, ensuring the torchon touches nothing.

To serve, remove the muslin and slice with a hot knife. If you think you will not use it all, refrigerate the rest promptly, rolled in clingfilm and tied at the ends. Do not refrigerate in the muslin or it will dry out. If you don’t use it all in five days, freeze.


For the mostarda:
Pit and quarter the nectarines. There is no need to peel. Place in a pot with the remaining ingredients and bring to a simmer. Cook, stirring only enough to dissolve the sugar, until the fruit is coated in a thick syrup.

Ladle into jars and refrigerate. These may also be pressure-canned for shelf storage.
The Continental
I called this “The Continental” because those Christopher Walken skits on Saturday Night Live are hilarious. This drink has nothing to do with that but it sounds retrograde and pretentious, making it a great pairing for the foie torchon.

Note: If you would rather eat your cocktail than drink it, add 1 whole sheet of platinum strength gelatin to the cocktail (sans ice) and bring to a simmer just long enough to melt the gelatin. Transfer to small polycarbonate or silicone half-dome molds and chill. Serve as a jelly to the foie torchon.
4 oz Riesling or Viognier
1 oz Calvados
1 oz St-Germain
3/4 oz peach pickling liquid from the pickled peach recipe
6 drops grapefruit bitters
Ice cubes (larger = better)
Combine all the ingredients except the ice and stir gently. Add the ice cubes and stir to chill. Strain into glasses with lemon peel.
I can flair if I want to flair. – Hidetsugu Ueno


 On the left, the real thing. On the right, the impostor.


